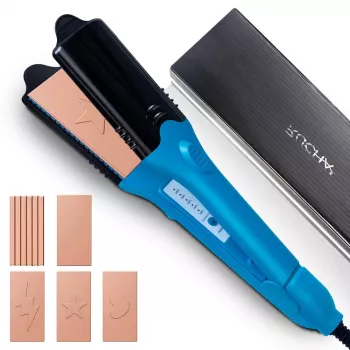
A single heat tool can do more than just straighten. With interchangeable shape plates, it’s possible to switch from sleek sections to defined crimps and bold, patterned texture—fast—without hauling multiple stylers. The result is a mix-and-match approach: smooth where you want polish, textured where you want volume, grip, or a statement finish. For more guidance, see Lionesse White Carbon Fiber Iron Review – Creative Fashion Blog.
This guide covers what makes interchangeable plate stylers unique, how to use them for clean results, and how to keep hair looking healthy while your style lasts. For further reading, see Most Cool Toys and Gifts For 3 Year Old Girls 2022 – Toy Buzz.
Traditional flat irons focus on one finish: smooth and straight (or soft bends with technique). An interchangeable plate styler expands that into a “toolkit” by swapping the plate surface that presses against the hair.
| Plate style (example) | Finish | Best for | Pro tip |
|---|---|---|---|
| Straightening plate | Smooth, sleek strands | Polished everyday styling; taming frizz | Use smaller sections and a steady glide for shinier results |
| Crimp/wave plate | Defined zig-zag or wave texture | Adding volume; building grip for braids and buns | Crimp only the mid-lengths for a more modern texture |
| Pattern/shape plate | Playful, noticeable texture | Accent pieces; party looks; framing layers | Apply to a few face-framing strands instead of the whole head |
| Mixed plate approach | Contrast: smooth + textured | Editorial looks; quick dimension on fine hair | Straighten top layer, texture the underlayer for hidden volume |
Great texture looks deliberate when the sections are tidy and the heat is controlled. A few small adjustments—especially section size and timing—make the difference between “styled” and “accidental crimp.”
Heat setting matters, but it’s not the only lever. Sectioning, product choice, and how many passes you do often determine how your hair feels the next day. Aim for the lowest heat that creates the look with one slow pass (or one clamp per segment for patterns).
| Hair type/condition | Suggested starting range | Styling notes |
|---|---|---|
| Fine or bleached | 250–300°F (120–150°C) | Use heat protectant; avoid repeated passes; choose subtler texture patterns |
| Normal/medium | 300–350°F (150–175°C) | Small sections help patterns show without extra heat |
| Thick/coarse | 350–410°F (175–210°C) | Prioritize sectioning; use a smoothing cream to reduce snagging |
| Curly/coily (straightening) | 370–430°F (188–221°C) | Blow-dry smooth first for less direct heat time on the iron |
Consistent heat styling can be done more responsibly when you treat prep and maintenance as part of the routine—not an afterthought. For general best practices, the American Academy of Dermatology Association recommends minimizing heat exposure and being mindful with chemical and heat combinations.
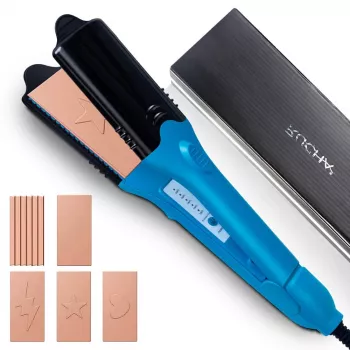
For quick switching between straight and textured finishes, the Hair Crimper and Straightener with 5 Interchangeable Fun Shape Plates keeps options in one place—ideal for mixing sleek sections with waves or playful pattern accents.
Damage depends more on temperature, prep, and how many times you clamp the same area than on the style itself. Crimping can cause extra stress if sections are too large and you keep re-clamping for definition, so use heat protectant, smaller sections, and the lowest effective heat.
Start with fully dry hair, use smaller sections, and let the hair cool before brushing or touching it. A lightweight mousse or texture spray before styling plus a light hold spray after helps keep definition without weighing roots down.
Snagging usually comes from tangles, residue buildup, or plates that aren’t attached securely. Detangle first, ensure plates are locked in place, clean cooled plates regularly, and use steady tension rather than yanking through a section.







Leave a comment